The Aim of this blog is to have one repository of user reviews of the gadgets used by them.

Show your support by becoming a follower of this blog.
If you wish to share your review of your device, just send in the abstract to: techenrepot@gmail.com
and then you will be added as a co-author after which you can post any number of reviews or write ups.


Sunday, July 11, 2010

Leads#2: DivX Certified Mobiles in INDIA

Well, there is no end to this ever growing technology. One thing that changed the perception of mobile phones was the mp3 technology. Every phone manufacturer made sure that their mobile had the mp3 support and it was a huge success that it almost dumped the mp3 players. Things are getting even hotter because now its time to have video playing capabilities on your phone and that’s how we have the .h264 technology.


Ahh! Its not over yet. Am sure everyone knows about those .avi movie files. They completely changed the way we watch the movies. They offer such good compression yet maintain superior quality. You get that same DVD quality but with a reduced size on disk(A 4GB DVD can be ripped to a .avi file of 700MB maintaining almost the same quality). The compression algorithm behind this .avi file is called the DivX/Xvid algorithms. Now what if these are available on a mobile device? Yes they already are. In this post I will post some of the DivX certified mobile phones which will almost dump your media player.

There are many software solutions available on the net. You can download the media players; install them on your mobile to play these files. But nothing can match the DivX certified mobiles. Reason? Because these devices are tried and tested and offer solution from the hardware (.h264) rather than software, so you get superior movie watching experience.


In the mobile phone industry (in INDIA) only Samsung and LG are offering Divx solutions. But things will change soon. All the phones discussed here are the ones that are available from 2010. There are many other phones like the LG KM Arena,Samsung Omnia etc who also offer the DivX certified devices which are quite old now. Additionally you may also want to know some of the touch screens like TFT LCD,OLED,AMOLED and Super AMOLED from our post on Touch Screen Phones here which will be helpful in judging the right DivX phone.


There are four classification in the certification listed as under:

DivX HD: Resolution 1280x720, supports .avi(encoded with DivX/Xvid algorithms), .divx files and .mkv(Matroska Video) HD files.

DivX Mobile: Resolution 320x240 supports .avi(encoded with DivX/Xvid algorithms) and .divx files


DivX Mobile Theatre : Max Resolution 640x480 supports .avi(encoded with DivX/Xvid algorithms) and .divx files

The coolest thing here is, you need not do any conversion. Just dump your movie files and these DivX certified devices just plays them smooth.Ok lets check these DivX babies right away:


Samsung Galaxy SPICA:


So in the ascending order, the phone that is in great demand in India is Samsung’s Galaxy SPICA i5700. This phone comes with a 3.2” capacitive TFT LCD(16M colors) screen with 800MHz processor doing the number crunching.It runs on Android Éclair which is from Google and the OHA which is getting popular now. It has got Samsungs own DNSe technology for superior audio quality. It’s a sheer pleasure watching movies on this phone. This phone is a DivX Certified Mobile device. I had watched a movie with a resolution of 704x288, it played them very smooth. You can check the review of SPICA in one of our posts here. Spica sells for around Rs. 12,500. Its very hard to find this phone in the market, if you find one just grab them, its worth for the money you pay.


Samsung Jet(2):


Samsung Jet s8003 has 3.1” AMOLED(16M colors) resistive touch screen, 800MHz processor and DNSe technology which makes sure you get a good audio experience. With the AMOLED screen the colours are more sharper, deeper and brighter than the good old TFT LCD and watching movies on such a display is awesome. If you don’t know what AMOLED’s are check our post on touch screen phones.The phone sells for around Rs. 13,000 and is a DivX Certified Mobile device.


LG GW620:


LG GW 620 is LG’s first Android phone running CupCake. It has 3” Resistive(256k color) TFT LCD screen, 528 MHz processor and a QWERTY slide out keyboard. The phone sells for around Rs 16,000 and is a DivX Certified Mobile device.

Samsung Wave :


Samsung has brewed up their own new OS called Bada OS. And Wave is the first device, infact their Flagship device to run their Bada OS. Wave has a 3.3” Super AMOLED Touch Screen(16M color), with a 1 GHz processor doing the math, FM Radio and DNSe.
If the Jet offered crisp movies with its AMOLED screen, Wave has Samsung’s new Super AMOLED screen which is more superior than the latter. Now this mobile is for sure going to make a bold statement on the multimedia front. This phone sells for around Rs. 18,000 and is DivX HD certified Mobile, which infact is the first phone to have HD certification. This means it will play all your 720p videos and .mkv files like a champ.

Samsung Galaxy i899:


Galaxy i899 is the first CDMA phone with Android Platform in India. This phone has a 3.2” AMOLED(16M colors) Resistive Touch Screen, with a 800MHz processor and DNSe. So, this phone too has the AMOLED screen which will make sure that you have a good movie watching experience. This phone sells for around Rs 19,000 which is tied with Reliance and is a DivX Certified Mobile device.

Samsung Galaxy S i9000:


The last phone on our list is from Samsungs Galaxy family called the Galaxy S i9000. This phone is Samsung’s flagship Android device. It has a huge 4” Super AMOLED(16 M color) touch screen with 1 GHz Processor doing the number crunching,FM Radio, DNSe and DLNA technologies. 4” screen+ Super AMOLED+DNSe+ DLNA= Theatrical experience.This phone is a DivX HD certified Mobile.The phone sells for around Rs 27,000.

Leads:

We have seen 6 different phones to super phones and it looked like a one sided game with Samsung filling 5 phones here. This trend of DivX certified devices has just started and other player will soon join LG and Samsung to catch up the mobile entertainment race.

Now picking your right DivX certified device depends on so many factors ranging from price,OS and to many other features like camera etc. But as far as our leads is concerned, it is to pick the device which is quite good player on all the segments (price, feature etc.).

So the Leads here is to 3.3” Super AMOLED screen+ DNSe+DivX HD(play HD .avi,.divx and .mkv) + flagship device+cost + feature = Samsung Wave S8500. Watching those movies on those Super AMOLED screens is surely going to give you goose bumps. With a price range of Rs 18,000, the Leads here is to Samsung Wave S8500.

If price is not a concern then Samsung Galaxy S is the mobile to look for as it has the now stable Android running and moreover is the flagship device of Samsung as well. This would simply mean that all the Android updates for Samsung will start from this device.

If none of the device impressed you, then you might check for good old LG KM Arena or the Samsung i8910 HD which are also DivX certified devices. To check out the complete list of Divx certified phones(or any DivX certified electronic device) check here.

Coming Soon:

Watch out for Samsung i5800 also called the successor of Samsung Galaxy SPICA and LG GT540 Optimus , the two phones which will be announced in the last quarter of this year. These devices are DivX Certified Mobile device.

Tuesday, June 8, 2010

Android Phone USB Tethering


Well as promised in the earlier post, I will discuss on how to convert your Android phone as a modem and browse from your PC in this post. There are handfuls of applications available for achieving USB tethering. However I had picked two methods one for M$ Windows and the other for Linux, which were little straight forward. Again you need not have to root your phone to achieve USB tethering. Lets get started with Windows:
For Windows(7/XP/Vista):

To do USB tethering in windows you need the tool called pdanet. Go to this site and download the installation file. The installation is pretty much straight forward.


Pre requests:

1) Drivers for your phone (Usually available with applications CD that comes along with the phone).
2) Pda net from this site.

*Note: If even after all the following steps your android mobile is not detected, try installing the android phones device drivers and then install pda net.

Step 1:

Install the Pda net application in your system. Do not connect your Android phone to the PC unless the pdanet application on your pc asks you to connect it. During the installation process, if everything went well, a message will be displayed as shown:


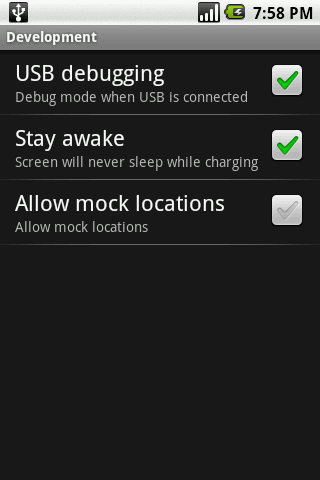
Follow the instructions in the message i.e connect your Phone with the following settings enabled: settings->applications->development and enable USB debugging. You should also enable installation of applications from unknown source by traversing to settings->applications and then enable the unknown source.

If this step is completed successfully then you should see the pdanet application in your android phone.

Step2:


From your phone run the pdanet application and select enable USB Tether. Now from your pc right click the pdanet icon in the start up list and select connect. The pdanet application can be seen running on your startup list. If not manually start the pdanet application. Congratulation, your Internet connection has been set up.

So everytime you want to tether your Android phone, make sure that the USB debugging option is enabled on your phone and then connect it to your computer.Launch the pdanet application in your mobile. Finally launch the pdanet application from your windows PC and establish a connection from there.


While disconnecting, make sure that you turn off USB tethering from your mobile first and then on your PC.

For Linux(Ubuntu):

In Linux, USB tethering is achieved using the azilink tool.
Pre-requests:
1)Android sdk for linux which can be found here.
2)Openvpn 2.1 (you can download from the launchpad here).
3)azilink and azilink.opn file(check out them here).

There already is a detailed post on how to achieve USB tethering here. This post will help you set up the USB tethering in Ubuntu. However in step number 4 of that post, while setting up rules files for your device, you may replace the ATTRS{idVendor} with the following code whichever is applicable:


*source of the above information.

The following posts may be of interest to you:

To know whats there more in this blog check here.

Want to sync your contacts from/to PC and your Android Phone??? Watch this space for the solution. If this post helped you, you can show your support by buzzing this post to your friends, becoming a follower or Join hands to publish your own review/posts.

Thursday, June 3, 2010

Installing apk Files Offline on Android Devices


The DROIDS nowadays happens to be the most happening device. The rate at which the number of applications that is increasing in the Android market speaks for itself. But there are people who don’t go for an Internet connection and thus cannot enjoy these applications, which takes your DROID to a different level. Don’t worry; there is a work around here to install these applications offline. In this post I will discuss how to install .apk (Android Application installation file) files in your DROID offline. I dont take any responsibility if you brick your phone in the process.

There are two cases:

CASE 1: If you already have a file manager then the task is very simple.


Maneuver to Settings->Applications and check the unknown source. This basically will allow you to install applications offline from 3rd party websites (mind you these applications are not authorized by Google, so there is no guarantee of its behavior). Then browse from your file manager to the specified folder and long press the .apk file. Voila your application is installed. A file manager is something like an explorer in windows, which allows you to browse through your files/folders in the SD card.

CASE 2:You have just now brought a brand new DROID and it doesn’t have a file manager.

In this method we will be using the Android SDK (Software Development Kit) to install files in your DROID. Follow the steps below one by one:

Note: Do not connect your phone to the PC unless it is specified in the following steps.

Step 1:

Download the Android SDK and install it in your PC. You can follow this link, which clearly explains all the steps including the download link of the SDK. You may however need to follow just the first 3 steps provided in the link.

Step 2:

Next you have to install the drivers of your Phone in the PC. Most of the manufacturers provide a CD with applications along with the Phone, which contains the drivers for the phones. Follow the instructions provided in the CD and install the drivers.

Step 3:


Now in your Phone (DROID), traverse to Settings->Applications->Development and enable (check) the USB debugging options. Once done, connect your phone via USB to the PC. If all the drivers were successfully installed then your device should be identified as a Android USB Composite device.

Step 4:

Open a Command prompt. Just issue the following command in the prompt:


adb install path/application


Where path is the path where your application is stored in the PC and application is the name of the application. Note: there is a space after adb and install. Issuing this command should start the installation procedure. And if all went successful you will get a message stating the application was successfully installed to your DROID.

First time reader of this blog? Check this post to know whats more in this blog!
Want to use your Android Phone as a modem for browsing Internet??? The solution is here. If this post helped you, you can show your support by buzzing this post to your friends, becoming a follower or Join hands to publish your own review/posts.

Tuesday, June 1, 2010

The Tech Entrepot's New Additions


Well, the past month had witnessed nearly 10 posts on various topics. We had also introduced couple of new interesting sections. The two new sections are Leads and Guides. There are few more other relevant sections, lets go one by one.

Leads:

The section Leads will help to choose from various options which includes technical specifications, market value and finally states some advantages of each gadget over the other which will clearly lead you to a right choice and that’s why its called leads.

Here are some Leads for MAY 2010:
Budget Android Phones.

Guides:

This informative section will basically introduce to various technology, its pros-cons, technical terms, market value and finally will introduce to some gadgets using those technologies. So knowing the technology before using it will be more productive and makes more sense right? So keep watching this space for more guides.

Here are some guides for MAY 2010:
Conditioning Mobile Phone batteries.
Touch Screen Phones.


Android Information:

As you can see from the posts in the month of MAY, there was more heat on Android and the DROIDs. The reason is one of the blog author owns a DROID so he quite often does experiments as a result you can expect more posts on Android :) . If you are aspiring to buy a DROID keep watching this blog there are lots more to come.

UP Next:

This section will just let the readers know the upcoming posts. Sometimes it takes a little time to actually publish the posts mentioned in the up next section due to the time constraints with each of those respective authors. But it’s assured that it will be published.

Related Videos:

Here you can view videos if any related to the posts in this blog.

HOT Gadgets:

All the gadgets that are reviewed will be put up in this section.


Most Frequently visited Posts:


If you are a first time reader or a casual blog reader then this section will let you choose the most frequently visited posts in this blog.


From the readers count, which reads nearly 1000 for just one single month is encouraging to go even little farther and publish posts on new topics. So it’s the readers who make this happen. You can always help this blog by publishing your own reviews, which in turn is going to help other readers. Just mail in your review to techenrepot@gmail.com and then you will be added as an author after which you can publish any number of posts.

If you like this blog and the idea behind this blog you can do some of the following:


Google Buzz:

On the right hand top of every post you have a buzz button, which you can click to share the post with your buzz mates. This will ensure that more readers come out and therefore many more reviewers come up which will help the seekers. So if you like the post feel free to buzz it to your friends.

You can catch The Tech Entrepot in Google Public Buzz in this link:
http://www.google.com/profiles/techenrepot#buzz


Subscriptions and sharing:

You cannot reach the blog all the time? No problem, you can just subscribe to The Tech Entrepot blog by providing your email id. A verification mail will be sent to you. Upon clicking the verification mail you will then get the posts right into your inbox. Further you can also share these posts in Tweeter as well as Face book.


Support & Suggestions:

Theres always room for improvements. If you would like to suggest any new ideas feel free to use the comments section to feed in your ideas. There are many posts in queue for this month from speakers to laptop and multimedia phones. So have an eye on this blog on all weekends for new posts. As always show your support by becoming the blog follower and well if you have a review just send an abstract to techenrepot@gmail.com and from there on you can publish any number of posts on this blog.


::Blog Admin::
Techenrepot.

Monday, May 24, 2010

4 Ways to increase battery backup in Android devices


In this post I will discuss some of the ways in which you can increase your battery backup in the devices running Android v1.5. However most of the features are applicable across different higher versions. All these tips are from the software point of view i.e the OS. However there is more to prolong your battery backup. Do check the post on Battery Conditioning to know more.

Warning: I don’t take any responsibility if you brick your phone while doing this.

1)Screen brightness, sounds / vibrations :

As can be seen from the Touch Screen phones post, the display is the one, which utilizes your battery the most. So it is highly essential that we supervise its usage. The screen brightness can be reduced when indoor, which can be very effective. Other than that we can also set a timeout for the screen so that whenever the screen is idle, the screen automatically gets locked.


To achieve this maneuver to Settings->Sound & Display->Brightness. From there reduce the screen brightness. You can also set the screen timeout at the same place (sound & Display) as well as some additional options such as Phone vibration, Audible touch-tones and Audible Selections, which can be unchecked to disable.

2)Task Killer:

Android as you know is multi tasking which means many activities can be run simultaneously. You can always view the recently run program by long pressing the home button. But whenever you navigate away from a task it is not closed and it still remains in memory. Take for example you open a browser, and then navigate away by the cancel or the back button, the browser still runs in the memory and is not closed. To ensure that unnecessary applications are closed a Task Killer is mandatory. This will ensure that all the unwanted process running in the background which u never knew was running and those sucking your battery gets killed. To know more on Task killer check this post Essential android applications.

3)Disable Internet connectivity.


The important pillar of android is that it lets you customize your device with thousands of applications from the Android market. But most of the applications connect to internet for remote processing or at-least for ads which u never want it to. There are many applications such as juice defender which allows you to turn off your internet when not in use. But you can also manually do it by changing the APN name from your settings.


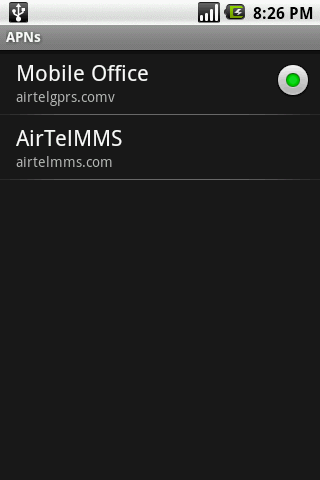
To achieve this maneuver to Settings->Wireless Controls->Mobile Networks->Access Point Names. From there select your service and change the APN name. And whenever you wish to use the internet you may replace back with the original APN name.

4) Aero Plane Mode:


Network services are the programs that run constantly and probe for the availability of signal in your area there by sucking your battery considerably. Most of the people leave the phone switched on or at least in silent mode during night. And all those hours these services probe for signal strength and utilize the battery. By switching to the Aero Plane mode all these services are put to sleep. Of coarse you don’t want to do this on day time especially when you are waiting the call from the special one. This method is useful for those who don’t want to lift calls in the night but yet would like to use the phone as an alarm.


This is achieved by long pressing the end call/power button and from there select the Aero Plane mode.Always turn off Bluetooth, wifi or any other services when not in use. These are monstrous services which suck your battery.

As said all these options are done from the software part. you can do a lot more by properly maintaining your battery by conditioning it. Check the post Conditioning Battery for more.