
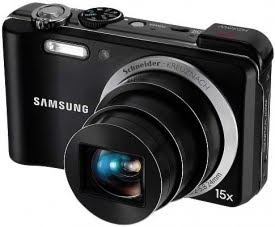
So here I intend to give the step by step procedure on how to install the maps onto Samsung WB650(HZ35W).Remember these steps are absolutely not required to take photo with GPS enabled. Its required only if you intend to use the map view mode to see the photos in maps in your camera.
Samsung has restricted the download of the maps to only 3 times. If your download exceeds thrice then you may not be able to download the maps any further. So here we go:
Step One: Go to www.samsungimaging.com and register your product(top right corner). Then from the home page select maps download at the bottom right corner of the home page. Clicking it should prompt you to provide your name, country and the serial number of your camera found near the battery department.
Step Two: Click submit and then read the license agreement. Click agree to proceed. That should take you to the download page.
Step Three: Download the three zip files that are required. They are
a)City Name(zip file).(Common for all countries)
b)Base map(zip file).(Common for all countries)
c)Your country map for example IND_08Q3.zip in my case India that is.
Remember these files are huge files so make sure you are on a good Internet connection.
Step Four: Create two folders namely city and mapview(upper/lower case doesn’t matter) in the SD Card.
Step Five: Unzip the city.zip file that you downloaded, that should give a file called world.adm. Copy that file into the folder named city.
Step Six: Unzip the mapview.zip file and that should show you two folders and a file namely Map,res and a file called system.ini. Copy these two folders Map,res and the file system.ini into the folder mapview.
Step Seven: Now we have unzipped two files that are downloaded. Unzip the last file with your country specific name and in my case it is IND_08Q3.zip that corresponds to India. That should give you two files with extensions .cfg and .bgf. Copy these files into the Mapview/map folder (in the map folder available within the Mapview folder).
Step Eight: Now all done, this is the final and optional step.The .cfg file basically is a configuration file that stores a default location. It is this default location that is used when the GPS lock is unavailable. All you have to do is write down the GPS co-ordinates of your default location to this file. To know your locations GPS co-ordinates go here and type your location. That should give you two co-ordinates namely Latitude and Longitude. Now open the .cfg file, go to the column named “CEN_LON=” and append it with the Longitude value. Go to the column named “CEN_LAT=” and append it with the Latitude value. Thats it. The picture below should give you a fair idea.

You can copy maps files of any country. All you have to do is just put in that country's respective .cfg and .bgf files in the Mapview/map folder (in the map folder available within the Mapview folder).
If you would like to have a look at some awesome photos from this camera check it out here. One of the photo also won the Streets Scenery challenge 2011 in www.samsungimaging.com which can be seen here. And one photo awarded as the best photo is available in the Must watch gallery of the site www.samsungimaging.com that can be seen here. You are free to use the photos anyway but link back to this blog. And of course you cannot commercialize those photos :). More details on the free usage can be seen here.
The comments section is open for discussions :).
